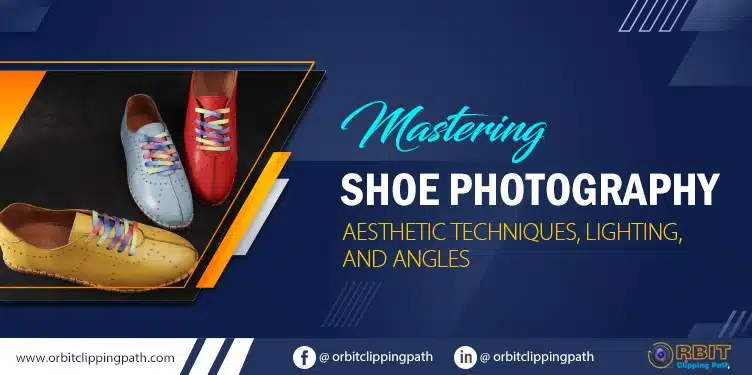
Importance of Shoe Photography
As an ardent photographer I have always liked the idea of clicking pictures that bring out a subject in its true identity. One category that has particularly intrigued me would be the world of shoe photography. Shoes are a canvas for art and style with their tiny details, expensive fabrics, solid colors. My expertise and insights on how I shoot beautiful shoes using the trusty ring light.
7 Simple Steps for Aesthetic Shoe Photography
Take Advantage of Photography Tips and Tricks for Stunning Shoe Photos To create the perfect photo, photographers to keep a few essential rules in mind. 7 Easy Steps to Taking Great Shoe Photos
1. Shoes Lay out the shoes and make them completely free of dust or blemishes. You need to think of the entire image and figure out how your shoes will sit in place.
2. Pick the Background: Finally, choose a background that adds dimension to those new shoes. Again, that could be a plain solid-colored contrasting backdrop or just your stuff in the background.
3. Play with Angles: No two images are the same, find out about various angles that work on getting shoes in their most positively flattering perspectives. For example, shoot the subject from above or below — not just at eye-level.
4. Using lighting: The correct use of light is a must in shoe photography. Use natural light and artificial lighting or a mixture of the two to add depth, pop out major details and cast shadows.
5. Camera settings: You should know how to manipulate the different camera settings, such as aperture, shutter speed and ISO in order for you to get your desired depth of field and exposure.
6. Utilize Props and Accessories: Use props, like jewelry, clothing etc., to give your shoe pictures context.
7. Go Over It and Edit: Evaluate your shots meticulously, editing them to make improvements in the look of your shoes.
Optimal Angles for Shoe Photography
In shoe photography obtaining the right angle is key. Try a few of these, see what you like and give the shot some pop.
1. DIRECTLY OVER THE TOP SHOOTING down at the base of the shoes, this will create a very clean minimal look and help to show off other cool shapes that are in the shoe.
2. Side Angle: This view will show the shoes in an angle so one can see a 3/4s of them, outlining curves and details that makes it pop out.
3. Three Quarter: The camera is placed a little bit from above and aside giving us balanced composition as well visually something-like this.
4. Low Angle Shooting: It is fired from a low angle to amplify and enliven shoes, thereby making them more magnificent in character.
Close-Up Details: Photographing small details such as stitched leather, ornamentation or the material of shoes can make very interesting close-ups where handcraft is most evidently shown.
Experiment with these angles and find the ones that best suit the unique characteristics of the shoes you’re photographing.
Lighting Techniques for Stunning Shoe Photos
It is very important that you spend a lot of attention on lighting, it can get your shoe photography to an either high level or totally break the picture. Below are some lighting methods that will take your shoe photographs to the next level:
- Sunlight: Use sunlight from a window or outdoor area for soft light to reflect the textures and colors of shoes.
- B Artificial Lighting This is when you might use a studio light or an LED panel to cast specific shadows, enhance some visible detail of the product that would…
- Reflectors: Bounce the light off of your reflector to add very subtle highlights or fill in shadows, this will help give more depth and dimension back into your shoe photos.
- Backlight: Place the light source behind your shoes, it will help create a high contrast (silhouette or rim lighting) which will add drama and layering to those flat looking shoe images.
- Lighting Type: Diffused lighting, which means softboxes, and umbrellas (generally in combination with a specific type of bulb) that are used to soften light sources so harsh shadows aren’t created — an effective way to create flatteringly professional using flash/studio lights.
The best part of it is, you can play around with the lighting setups and techniques together to figure out that sweet spot where shoes still look the way they do IRL.
Camera Settings and Gear for Shoe Photography
You also need right camera settings as well gear to click good quality photographs of shoes Here are some tips:
1. Choose your camera wisely — A DSLR or Mirrorless with manual control and capability to capture RAW photos for more flexibility in post processing
2. Lens Choice: A macro lens, or a lens you can shoot up close with, will work best for showing detailed features and textures of the shoes. Both 50mm or the100mm macro Lenses are great picks as well.
3. Depth of field: Choose a wide depth when you have your legs crossed on the floor or in this case my lenses; at f/4, however that can take only very little time.
4. Shutter Speed (: Increase this to freeze any movement and make sure your image is clean, sharp; prevent blurry images when taking photos on an angle or with something in the photo eg. cascading food).
5. ISO: Except when you are shooting in low light, keep the ISO as close to 100 (or whatever is a base/native) setting.
6. Tripod – There are many instances when a tripod can be absolutely necessary to keep your camera steady, especially for those slow shutter speeds and macro photography shots.
7. Lighting Equipment: Invest on lighting equipment such as studio lights, reflectors, and diffusers so that you will have control over the light in your shoe photography setup.
When you adjust your Camera settings and get the right gear, then make it possible for yourself to be able to take great shoe photos.
Common Mistakes to Avoid
When getting started with shoe photography, expect to make a few mistakes; however hope for the best — that hopefully, these are handful of things you’ve learned here and your work can fly high above. We also need to know what NOT to do such as these mistakes:
1. Backgrounds that Are Too Busy/ Distracting: Look at the background and make sure it does not overpower or take attention away from your main subject — which are obviously, shoes.
2. Uneven Lighting: You may need to test different lighting configurations for shoes that would audibly disturb due, experiment provides most convenience and professional-looking.
3. Incorrect placing of shoes: This point further comes in setting the shoe stand, to successfully set it keep seen anyway not randomly.
4. Sloppy: Take a really close look at these sneaks before you start snapping shots.
5. Over Editing / Under Editing the Images: Don’t overdose or underdose using post-processing in your best efforts to enhance the shoes’ features — they need to appear real and natural.
Avoid these common pitfalls and you will see good results consistently in your shoe pictures, or any other type of aesthetic medical photography.
Conclusion
Shoe Photography is a combination of technical expertise, creative vision and detail oriented eyes. If you follow the advice in this article, from creating your own lightbox to editing after the fact, then soon enough all of those shoe snaps will be professional-level and drinks perfectly balanced.
Explore outstanding professional photo editing at Orbit Clipping Path! Whether you require perfect background with expert retouch, image masking or clipping path — we have the top-of-the-line service. With our exclusive editors, refine your images and leave no place for error. Go for Orbit Clipping Path and get the best in photo editing services, turn your clicks into masterpieces! Get in touch with us today to get started!
Categories
Recent Posts

Color Correction Services
Color Correction Services
Background Remove Services
Background Remove Services
Clipping Path Services
Clipping Path Services
Image Manipulation Services
Image Manipulation Services
Image Masking Services
Image Masking Services
